|
Powering Down the System
| Removing the Panels |
Removing the Tape Drive |
Replacing the Tape Drive |
Replacing the Panels |
Powering up the System
Tools Required:
NONE
Estimated time: 5-10 minutes
- Step 1 - Sign off all users.
DO NOT PROCEED UNTIL
ALL USERS HAVE SIGNED OFF
- Step 2 - Call IBS to
verify if you need to switch to manual mode for the power down sequence
- Step 3 - Go to a command line then type
'GO POWER' and press
ENTER

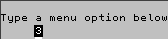
- Step 4 - Select option
'3' (Power Off the System
Immediately) then press
ENTER
- Step 5 - Confirm system power off by pressing
F16 (Shift F4 on PC
Keyboards).
- Step 6 - Wait for system to shut down and fan to turn off
- Step 7 - Disconnect the power cable from the back of the server unit
[next step]
[top]
Tools Required:
Drill,
1/4", 9/32" and 7mm Drill bits,
Screw Driver,
Phillips Screw Driver
1 small container to place the screws
Estimated time: 15 minutes
- Step 1 - Remove the front panel (the panel will come off from by pulling
the bottom side first)
- Step 2 - Check the back of the server to see if there is a screw
retaining the top panel cover. Loosen the screw on the back to permit
the top panel to slide forward. You do not need to remove this screw
- Step 3 - Remove the top panel (the panel will slide about 1/2 in.
forwards).
- Step 4 - Remove the left side panel (each panel will have 1-2 retaining
screws located on the front and back of the panel)
- Step 5 - Remove the retaining cage on the left side of drive cage (not
all models will contain a retaining cage)
[next step]
[top]
Tools Required:
Drill,
1/4", 9/32" and 7mm Drill bits,
Screw Driver,
Phillips Screw Driver
1 small container to place the screws
Estimated time: 10-15 minutes
- Step 1 - Locate the tape drive (normally labeled with 'QIC' on the front
of it)
- Step 2 - Remove the front retaining screws 1-2 (located on either side
- Step 3 - Remove the side retaining screws 1-2 (located on the left side
of the tape drive
- Step 4 - Disconnect the data cable in the back of the tape drive
- Step 5 - Disconnect the power cable from the back of the tape drive
- Step 6 - Slide the tape drive forward and pull out through front of case
[next step]
[top]
Tools Required:
Drill,
1/4", 9/32" and 7mm Drill bits,
Screw Driver,
Phillips Screw Driver
1 small container to place the screws
Estimated time: 5-15 minutes
- Step 1 - Slide the tape drive into the cage
- Step 2 - Connect the power cable in back of tape drive
- Step 3 - Connect the data cable in back of tape drive
- Step 4 - Replace the screws on the side and front of tape drive (the
drive placement should be even with the other drives on the front panel)
- Step 5 - Replace the retaining cage on the left side of drive cage (if
applicable)
[next step]
[top]
Tools Required:
Drill,
1/4", 9/32" and 7mm Drill bits,
Screw Driver,
Phillips Screw Driver
1 small container to place the screws
Estimated time: 5-10 minutes
- Step 1 - Replace the left side panel (each panel will have 1-2 retaining
screws located on the front and back of the panel)
- Step 2 - Check the back of the server to see if there is a screw
retaining the top panel cover. Tighten the screw on the back to permit
the top panel to slide backwards and lock into place. This screw is
not required
- Step 3 - Replace the top panel (the panel will slide about 1/2 in.
forwards).
- Step 4 - Replace the front panel (the panel will go back on by sliding
the top side in 1st then pushing forward on the bottom)
[next step]
[top]
Tools Required: PATIENCE
Estimated time: 15-60 minutes
- Step 1 - Call IBS
(888-640-1252)
- Step 2 - PRESS the WHITE power
button
- Step 3 - Wait for sign on or message on screen. Inform IBS of
whichever appears.
[next step] [top]
|